
If you’ve been building Gunpla for a while, you’ve probably wondered when to take the next big step — and for many hobbyists, Gunpla airbrushing for beginners is that leap. Airbrushing opens up a world of custom colours, smooth gradients, and professional-looking finishes that spray cans and Gundam Markers simply can’t match. Whether you’re in Kuala Lumpur, Penang, or anywhere else in Malaysia, this guide will walk you through everything you need to know to get started with airbrushing your Gunpla kits confidently in 2026.
Why Upgrade From Spray Cans to an Airbrush for Gunpla?
Spray cans (rattle cans) are a perfectly fine way to paint Gunpla, and many Malaysian builders use them well. But once you start airbrushing, it’s hard to go back. Here’s why hobbyists make the switch:
- Full colour control — Mix any shade you want using Mr. Color, Tamiya Acrylic, or Vallejo paints. No more hunting for that perfect red or metallic blue in a can.
- Thinner, more even coats — An airbrush delivers fine mist at low pressure, reducing the risk of orange peel, runs, or pooling.
- Cost-effective over time — A single bottle of lacquer paint costs about RM10–15 and covers several kits when thinned correctly. Compare that to buying a new spray can for every colour.
- Weathering and shading effects — Pre-shading, post-shading, zenithal priming, and chipping effects all become possible with an airbrush.
- Works indoors more safely — With a proper spray booth and ventilation, you can airbrush comfortably even in a small Malaysian apartment.
The Essential Gunpla Airbrush Equipment You Need
Before you buy anything, understand the two core pieces of equipment: the airbrush and the air compressor. Together, they form your painting system.
Choosing Your First Airbrush
For Gunpla, a 0.3mm dual-action gravity-feed airbrush is the gold standard for beginners. “Dual-action” means you control both airflow (by pressing down on the trigger) and paint flow (by pulling back) independently — giving you fine control over your lines and coverage. Popular beginner options include:
- Iwata NEO CN — Widely available, affordable, and easy to clean.
- Sparmax MAX-2 — Excellent build quality for the price, a favourite in the Malaysian modelling community.
- Tamiya Spray-Work Basic HG — Good entry-level option if you’re already buying from Tamiya.
Avoid single-action airbrushes for detail work — they give you less control and are harder to learn on.
Choosing Your Air Compressor
Your airbrush needs a consistent air supply, which is where the compressor comes in. For Gunpla, you want something quiet, compact, and with a tank to keep air pressure stable. Top picks include:
- Mr. Linear Compressor L3/L5 (GSI Creos) — The L3 is extremely quiet (around 30dB) and popular for apartment use. This is a top seller in Malaysian hobby shops.
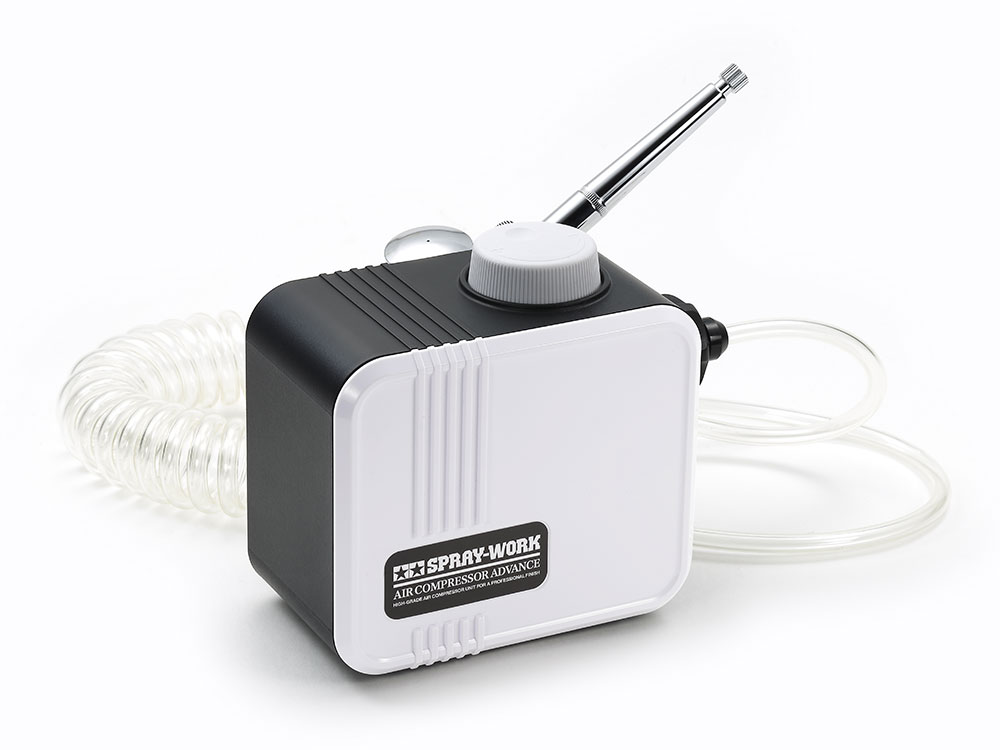
- Tamiya Spray-Work Compact — Reliable and well-supported, ideal if you pair it with Tamiya paints.
- Sparmax TC-620X — Comes with a tank and auto-shutoff, a step up for those who want more consistency.

What Paints Work Best for Gunpla Airbrushing?
Paint choice is one of the most debated topics in the Gunpla hobby. Here’s a practical breakdown of the three main types:
- Lacquer (e.g. Mr. Color, Mr. Hobby Gundam Color) — The preferred choice of most experienced builders. Fast drying, durable, and sticks extremely well to plastic. Requires proper ventilation as fumes can be strong. Thin with Mr. Color Thinner or Leveling Thinner at a 1:1 to 1:2 paint-to-thinner ratio.
- Acrylic (e.g. Tamiya Acrylic, Vallejo) — Water-based, lower fumes, safer for beginners and indoor use. Slightly less durable than lacquers but perfectly fine for display models. Thin with Tamiya X-20A or distilled water.
- Enamel (e.g. Mr. Color Enamel, Tamiya Enamel) — Often used for detail work and panel lining over a lacquer base coat. Can eat into styrene if used undiluted, so handle with care.
For most beginners in Malaysia, starting with Tamiya Acrylics is a safe bet — they’re widely available, easy to clean up with water, and forgiving while you’re learning your technique.
Preparing Your Gunpla Kit Before Airbrushing
Preparation is everything in Gunpla airbrushing. Rushing this step is the number one mistake beginners make. Follow this process:
- Nub removal and sanding — Cut parts cleanly from the runner, trim any nub marks, and sand smooth using 400 to 800 grit sandpaper. Surface imperfections will show under paint.
- Washing parts — Soak parts in warm, soapy water and gently scrub to remove mould-release agents and finger oils. Allow to dry fully before priming.
- Priming — Apply a thin coat of grey primer (Mr. Surfacer 1000 or 1200 is the Gunpla community’s standard). This reveals surface flaws and gives paint something to grip. Sand with 1000 grit after priming if you spot any scratches.
- Mounting on painting sticks — Use spare runners, wooden chopsticks, or metal rods pushed into hidden areas (joints, screw holes) so you can hold and rotate parts without touching the surface.
Basic Airbrushing Technique: How to Actually Paint Your Kit
Now the fun part. Once your parts are primed and mounted, here’s how to paint with an airbrush:
- Set your pressure — Start at around 15–20 PSI for acrylics, or 18–25 PSI for lacquers. Too low and paint won’t atomise; too high and it dries mid-air and causes a grainy texture.
- Thin your paint properly — Aim for a skim-milk consistency. Too thick causes tip dry and splatter; too thin causes transparent, watery coats. The commonly suggested ratio is 1:1 for lacquers and 1:1.5 for acrylics (paint to thinner).
- Trigger technique — Press down first to release air, then pull back to release paint. Start spraying before the part and end after it to avoid any blobs at the start and end of your stroke.
- Build up thin coats — Apply 2 to 3 thin coats, allowing each to flash-dry (about 5 minutes for lacquers, 15–20 minutes for acrylics) before the next. Never try to cover in one thick coat.
- Keep moving — Stay about 5–10cm from the part and keep the airbrush moving in steady, overlapping passes. Stopping in one spot causes runs and blotches.
Airbrush Safety Tips for Malaysian Hobbyists
Painting indoors in Malaysia’s climate requires a bit of extra care. Here’s how to stay safe:
- Ventilation is essential — Even acrylic paints release fine particles when airbrushed. Paint near an open window or use a spray booth with an extraction fan to direct fumes outside.
- Wear a respirator — A basic dust mask is not enough for lacquers. Use an organic vapour respirator (available at hardware stores for around RM30–50).
- Humidity and heat — Malaysia’s high humidity can cause lacquers to “blush” (turn milky). Paint during cooler parts of the day, ideally with air-conditioning on, and avoid painting outdoors during humid evenings.
- Clean your airbrush immediately — Run thinner through your airbrush right after each colour change and at the end of every session. Dried paint inside the nozzle is a nightmare to remove and can permanently damage your airbrush.
Where to Get Airbrush Supplies in Malaysia
You don’t need to import everything from Japan. Gundam.my stocks a solid range of airbrush tools and accessories, including compressors, Mr. Color paints, thinners, primers, and spray booths — all available for delivery across Malaysia. Whether you’re picking up your first Mr. Hobby Gundam Color set or upgrading to a Mr. Linear Compressor L5, you’ll find what you need without the hassle of international shipping.
Final Thoughts: Is Airbrushing Worth It for Gunpla?
Absolutely yes — but only when you’re ready for it. If you’ve mastered the basics of building, panel lining, and applying top coat, airbrushing is the natural next step that will transform the quality of your finished kits. The learning curve is real, and you’ll likely have a few failed attempts at the start. But once it clicks, you’ll have a painting skill that applies to every kit you build for the rest of your Gunpla life.
Start with a simple HG kit in one or two colours, keep your equipment clean, and don’t be afraid to experiment. The Malaysian Gunpla community is welcoming and full of builders who started exactly where you are now.