
Gunpla Priming Guide for Beginners: Do You Really Need to Prime Your Kits? (2026)
If you’ve just started painting your Gunpla kits, you’ve probably come across the word primer a dozen times already. Some builders swear by it, others skip it entirely — so what’s the truth? As a fellow hobbyist, I’ll tell you this: priming your Gunpla is one of those steps that separates a good paint job from a great one. This Gunpla priming guide will walk you through everything you need to know — from what primer actually does, to which type to buy, and exactly how to apply it — all without overcomplicating things.
What Is Gunpla Primer — And What Does It Actually Do?
Primer is a preparatory undercoat that you apply to your Gunpla parts before painting them. Think of it like a sticky foundation layer between the raw plastic and your topcoat colour. Bandai’s plastic is smooth and non-porous, which means paint doesn’t naturally “grip” onto it very well. Without primer, your paint can chip, peel, or simply look uneven — especially if you’re painting by hand or airbrushing thin coats.
Primer also does something really useful: it reveals surface imperfections. Once your parts are coated in a uniform grey or black layer, you’ll immediately spot any leftover nub marks, scratches from sanding, or gaps in putty work that you might have missed. It’s like turning on the lights in a dark room — suddenly everything you need to fix becomes visible. Sand those spots down, reprime, and then you’re ready to paint with confidence.
On top of all that, primer creates a consistent, neutral base colour so your topcoat paints look exactly the shade they’re supposed to — rather than having the original plastic colour “bleed” through thin layers of paint.
Do You Actually Need to Prime? (Honest Answer)
Short answer: it depends on what you’re going for.
If you’re doing an out-of-box (OOB) build — no paint, just panel lining and top coat — then no, you don’t need to prime. Primer is a painting prep step, so if you’re not painting, you can skip it entirely.
But if you plan to paint any part of your kit, priming is highly recommended. Even if you’re only hand-brushing on a few accent colours, primer dramatically improves how well the paint sticks and how smooth the final result looks. For airbrushed builds or full repaints, priming is essentially non-negotiable.
The bottom line: prime whenever you paint. It takes maybe 30 minutes extra across your whole build, and it will make your paint job last years longer.
Primer Types: Spray Can vs Airbrush Bottle
There are two main ways to apply primer to your Gunpla parts:
- Spray can primers — These are the most beginner-friendly option. You don’t need any extra equipment, just a can of primer and some pegs or holding sticks to secure your parts. Mr Hobby’s Mr Surfacer range and Tamiya’s Fine Surface Primer are the community gold standards. Spray cans are great for even coverage and are easy to control once you get a feel for distance and movement.
- Airbrush bottle primers — Brands like Vallejo Primer and Mr Primer Surfacer (bottle version) are popular among builders who already own an airbrush setup. These give you more control over coat thickness and are more economical in the long run, but require thinning and airbrush maintenance.
For beginners, a spray can is the way to go. It’s affordable, convenient, and delivers consistent results right out of the box.
Choosing the Right Primer Colour: Grey, Black, or White?
One question that trips up a lot of beginners: which colour primer should I use? Primer comes in three main colours — grey, black, and white — and each serves a slightly different purpose.
- Grey primer is the all-rounder and the best choice for beginners. It’s neutral, meaning it won’t noticeably shift your topcoat colours in either direction. Grey primer works well under most standard Gunpla colour schemes — whites, blues, reds, yellows, and greens all look accurate over grey.
- Black primer is brilliant for creating deep, dramatic shadows in panel lines and recesses without additional weathering steps. It’s popular for dark-coloured kits like the Sinanju, Zaku II, or any suit with a mostly grey/black scheme. Metallic paints over black primer also look stunning — it gives them extra depth and richness.
- White primer is used when you need pure, vivid colours — especially yellows, light blues, and pastels that can otherwise look muddy over grey. The catch is that white primer requires more coats to cover evenly, so it’s a bit trickier to apply without visible streaks.
If you’re not sure which to pick, just grab a can of grey. You can’t go wrong with it for 95% of builds.
Mr Surfacer vs Other Primers: Which Should You Buy in Malaysia?
The most talked-about primer in the Gunpla community is Mr Surfacer by Mr Hobby (GSI Creos). It comes in several “grits” — 500, 1000, 1200, and 1500 — each corresponding to how fine the surface finish is:
- Mr Surfacer 500 — Coarser, best for filling larger gaps and imperfections. Not ideal as a final primer before painting since it leaves a rough texture.
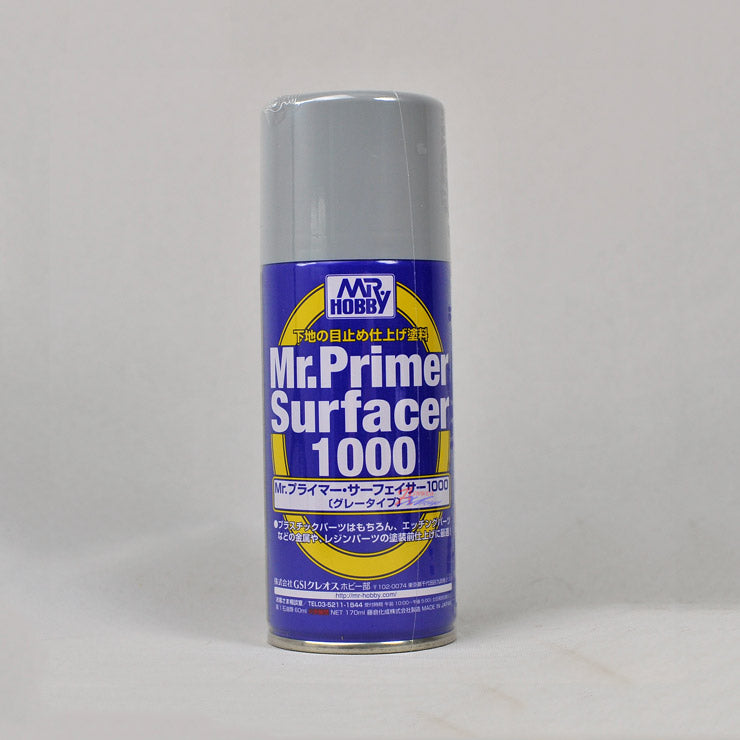
- Mr Surfacer 1000 — The most popular all-purpose primer. Fills minor scratches and nub marks beautifully, leaves a smooth finish. Great starting point for beginners.
- Mr Surfacer 1200 — Finer than 1000, gives an even smoother surface. Good for detailed kits where you want the finest possible finish before painting.
- Mr Surfacer 1500 (Black) — Ultra-fine and available in black, perfect for pre-shading and highly detailed display builds.
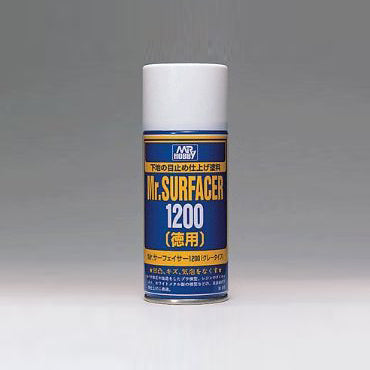
For most Malaysian hobbyists just getting into painting, I’d recommend starting with Mr Surfacer 1000 (spray can). It’s widely available, easy to use, and handles the most common priming tasks brilliantly. If you want to step up later, try 1200 for your more detailed master grade builds.
Other solid options include Tamiya Fine Surface Primer (grey or white) — it’s slightly more expensive per can but applies very evenly and dries quickly in our Malaysian humidity. For a budget-friendly local option, check out the painting materials section at Gundam.my — they stock a good selection of primers and surfacers suited for our climate.
Step-by-Step: How to Prime Your Gunpla Kit Properly
Ready to prime your first kit? Here’s exactly what to do:
- Prep your parts. Cut all parts from the runners, remove nubs, and sand everything smooth with 400-grit and then 600-grit sandpaper. Wash the parts in warm soapy water to remove fingerprint oils, then let them dry completely — this is crucial in Malaysia’s humid climate.
- Mount parts on sticks. Use cocktail sticks, bamboo skewers, or hobby peg holders to secure each part. Stick them into a piece of styrofoam or a cardboard box so they stand upright and you can spray all sides without touching the parts directly.
- Shake the primer can well. A full 2–3 minutes of shaking ensures the propellant and pigment are fully mixed. This avoids spitting or uneven pressure when spraying.
- Spray in a well-ventilated area. Outside in the shade, or in a room with strong air circulation. Avoid direct sunlight (which can cause the primer to dry too fast and crack) and high humidity (which can cause a “frosting” effect). Early morning or evening works best in Malaysia.
- Apply thin, even coats. Hold the can about 20–25 cm from the part. Use sweeping left-to-right passes — don’t stop over a single spot. Two thin coats are always better than one heavy coat. A heavy coat will fill in panel line details and create drips.
- Allow full drying time. At least 30 minutes between coats, and at least 2–3 hours before painting. Mr Surfacer lacquer primer is touch-dry in about 15–20 minutes, but fully cured takes longer — be patient.
- Inspect and sand any remaining imperfections. Under good lighting (natural light or a lamp), look at each primed part. Spot any remaining nub marks or scratches? Hit them lightly with 800-grit or 1000-grit sandpaper, dust them off, and apply one more thin coat of primer before painting.
Common Gunpla Priming Mistakes (and How to Avoid Them)
Even experienced builders mess these up sometimes — so don’t worry if your first attempt isn’t perfect:
- Priming in high humidity. If the air is too moist (common in Malaysia), lacquer primers like Mr Surfacer can develop a chalky “frosted” surface. Always check humidity and avoid priming after rain or during midday tropical heat.
- Applying too thick a coat. It’s tempting to try to cover everything in one pass, but thick coats fill in panel lines and cause drips. Thin coats, twice over, always wins.
- Not washing parts before priming. The oils from your fingers will repel primer and cause bare patches. Even if parts look clean, a quick wash makes a real difference.
- Rushing and painting before primer is fully dry. Wet primer under paint = trapped solvent = paint that lifts and wrinkles. Give it proper drying time — there’s no shortcut here.
- Using the wrong primer for your topcoat. If you’re using lacquer paint (like Mr Color), any primer works. But if you’re using enamel paint, make sure you don’t apply it directly over a fresh lacquer primer — let the lacquer cure for at least 24 hours first. Acrylics are the most forgiving and work over almost any cured primer.
Ready to Start? Get Your Primers at Gundam.my
Priming is one of those skills that feels intimidating the first time, but becomes second nature after a couple of builds. The difference in paint adhesion and finish quality is immediately obvious — and once you’ve primed a kit properly, you’ll never want to skip it again.
Whether you’re picking up your first can of Mr Surfacer 1000, experimenting with black primer for a Zaku build, or finally investing in a proper airbrush primer setup, Gundam.my has everything you need. Our painting materials and modelling tools section is stocked with primers, surfacers, and all the hobby supplies that Malaysian Gunpla builders rely on.