
When you first get into Gunpla, one of the most common questions you’ll hear is: “Do I need glue for this?” The short answer is — it depends. But once you start doing intermediate builds, seam-line work, or tight-fitting connections, understanding your Gunpla cement guide options becomes genuinely important. This 2026 guide covers everything Malaysian hobbyists need to know about plastic cement, limonene glue, CA cement, and when to use each one.
Do You Actually Need Glue for Gunpla?
Most modern Bandai Gunpla kits are designed as snap-fit builds — you push parts together and they hold firmly without any adhesive at all. For beginners, this is great news: no glue required, and you can even take parts back apart for repainting or fixing mistakes.
However, there are specific situations where cement becomes very useful or even essential:
- Seam line elimination — gluing two halves together and sanding them flush to hide the join line.
- Tightening loose joints — reinforcing a polycap connection that has worn out over time.
- Fixing broken parts — snapped runners or stressed plastic.
- Permanent poses and dioramas — when you want the build locked in a specific position forever.
If you’re doing a straight-build (out of the box, no painting), you can skip cement entirely. But if you’re aiming for a clean, refined finish, having a bottle of cement in your toolkit makes a real difference.
Type 1: Standard Plastic Cement — The Classic
Regular plastic cement (like Tamiya Cement and Mr Hobby Mr. Cement) uses a solvent that slightly melts the plastic surfaces, fusing them together as it cures. When done correctly, the two pieces become one single piece of plastic — there’s no adhesive layer between them, which is why sanded seam lines can disappear completely.
This type of cement is thicker and slower-setting, giving you time to position parts carefully before the bond locks. It’s ideal for:
- Large surface joins (like leg shells and torso halves)
- Beginners learning seam line work, since the slower cure gives a bigger margin for error
The downside is that it leaves a thicker film on the plastic surface if you’re not careful, which can be messy to clean up before sanding.
Type 2: Extra Thin Cement — The Builder’s Favourite
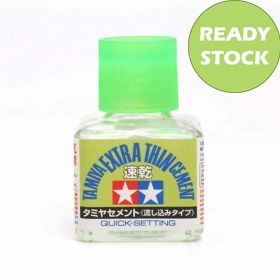
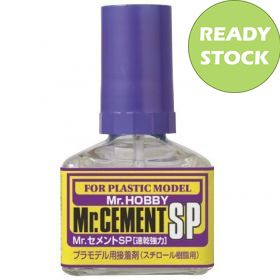
If there’s one product that shows up in nearly every serious Gunpla builder’s toolkit, it’s extra thin cement. Products like the Tamiya Extra Thin Cement and Mr Hobby Mr. Cement S use a watery, low-viscosity formula that flows into the tiniest gaps by capillary action — you fit the parts together first, then touch the brush tip to the seam and watch the cement wick in on its own.
The benefits are significant:
- No mess on the outer surface — the cement goes exactly where you want it
- Fast cure time (especially the quick-setting variants)
- Extremely strong bond once cured
- The fine-tip applicator brush makes precision work easy
The quick-setting variant (Tamiya Item 87182) dries roughly four times faster than the standard version — great for production-line building when you want to move through sections efficiently. The trade-off is that you have very little time to re-position parts, so fit everything dry first before applying.
For seam line work on Gunpla, extra thin cement is the go-to choice among Malaysian hobbyists because it gives you tight, clean bonds with minimal cleanup.
Type 3: Limonene Cement — The Safe and Smell-Friendly Option
Standard plastic cement has a strong chemical smell from its solvents. If you build in an enclosed space — a bedroom, a small apartment, or somewhere with limited ventilation — the fumes can be unpleasant and potentially harmful with prolonged exposure.
Limonene cement is the solution. It uses limonene, a natural solvent extracted from citrus fruit peel, which gives it a mild, pleasant orange scent instead of harsh chemical fumes. It’s safer to use in less ventilated spaces, and it still works as a proper plastic welder — not just a surface adhesive.
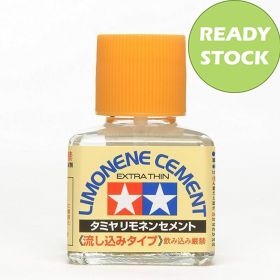
Tamiya offers both a standard and an extra thin limonene version. The extra thin type (Tamiya 87182L) works the same capillary-action way as regular extra thin cement but with the gentle citrus smell. Mr Hobby also sells an excellent limonene pen-type applicator that’s brilliant for precision work on detail areas.
The cure time on limonene cement is slightly slower than solvent-based types, and the initial bond strength before full cure can feel a little softer — so give it adequate drying time before sanding.
Type 4: CA (Super) Glue — Only for Specific Jobs
This is where a lot of new builders go wrong: reaching for a tube of super glue (CA glue) for their Gunpla. Super glue does not weld plastic the way plastic cement does — it creates a surface bond that can be brittle and leave white residue (called “blooming”) on dark plastic.
That said, CA glue does have legitimate uses in Gunpla:
- Resin and metal parts — third-party detail parts that plastic cement won’t bond
- Mixed materials — attaching a metal piece to a plastic surface
- Emergency repairs on pre-painted surfaces — where you can’t use solvent cement without damaging the paint
- Gap filling — thick CA gel can fill small gaps when you don’t have putty
Tamiya makes excellent CA cements (standard, gel, and quick types) that are formulated specifically for model kits and minimize the white residue problem. If you do use CA glue, use it sparingly and consider a CA activator spray to speed up cure time without the risk of it setting too slowly and running.
Quick Comparison: Which Cement Should You Choose?
Here’s a simple way to decide:
- Seam line removal on large parts → Extra Thin Cement (Tamiya or Mr Hobby S type)
- Building in a bedroom or small space → Limonene Extra Thin Cement
- First time using cement / slow, controlled work → Standard Plastic Cement
- Resin or metal parts / emergency fix → CA Cement (Tamiya CA Cement gel type)
- Speed building / production-line assembly → Extra Thin Quick-Setting Cement
Pro Tips for Using Gunpla Cement Safely and Effectively
A few habits that will save you from common cement disasters:
- Always do a dry fit first. Snap the parts together and check the alignment before any cement is applied. Once you glue, repositioning is very difficult.
- Apply cement sparingly. A thin wicking application is always better than flooding the seam. Excess cement will squeeze out and can melt surface detail if left too long.
- Let it cure fully before sanding. Most cements need at least 30–60 minutes to set enough for light sanding, and 24 hours for a full hard cure before aggressive sanding.
- Store bottles cap-side down. This keeps the brush wet and prevents the cement from thickening or drying at the tip between sessions.
- Ventilate your workspace. Even limonene cement benefits from some airflow. Keep a window slightly open and take breaks.
Where to Buy Gunpla Cement in Malaysia
All the products mentioned in this Gunpla cement guide — Tamiya Extra Thin, Mr Hobby Cement S, Limonene varieties, and CA cements — are available at Gundam.my’s modelling tools section. We stock the full range so you don’t have to hunt around multiple shops or wait on slow international shipping.
Whether you’re a beginner picking up your first bottle of extra thin cement or an experienced builder looking for a low-odour limonene option, we’ve got you covered with competitive Malaysian pricing and fast local delivery.