- SHOP
-
-
PRODUCT CATEGORY
- Modelling Tools
- Gundam Parts
- Gundam Model Kits
- Other Series Kits
- Others
-
PRODUCT GRADES
-
- Entry Grade (EG)
- FIRST GRADE (FG)
- FULL MECHANICS
- GUNDAM HEAD BUST
- HI-RESOLUTION MODEL
- HIGH GRADE (HG) 1/100
- HIGH GRADE (HG) 1/144
- MASTER GRADE (MG)
- MASTER GRADE EX (MGEX)
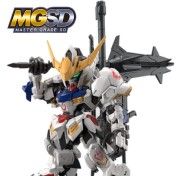
- MASTER GRADE SD (MGSD)
-
-
- GUNDAM SERIES
-
-
List of Gundam model kits based on series
-
- AFTER WAR GUNDAM X
- CHAR`S COUNTER ATTACK
- G GENERATION
- GUNDAM AGE
- GUNDAM BREAKER BATTLOGUE
- GUNDAM BUILD DIVERS
- GUNDAM BUILD FIGHTER / TRY
- GUNDAM BUILD METAVERSE
- GUNDAM HEAD PART
- GUNDAM SEED ASTRAY
- GUNDAM SEED FREEDOM
- GUNDAM SEED STARGAZER
- GUNDAM SEED/ SEED DESTINY
- GUNDAM WING G-UNIT
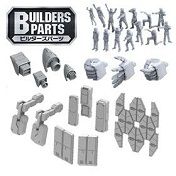
- GUNPLA BUILDERS
- IRON BLOODED ORPHANS
- LEGEND BB
- MOBILE FIGHTER G GUNDAM
- MOBILE SUIT GUNDAM
- MOBILE SUIT GUNDAM: THE ORIGIN
- MS GUNDAM 00
- MS GUNDAM 0080: WAR IN POCKET
- MS GUNDAM 0083: STARDUST MEMORY
- MS GUNDAM F90 / F91
- MS GUNDAM NARRATIVE
- MS GUNDAM THREE KINGDOM
-
-
- PROMOTION
-
-
Special Deals
-
- Plastic Flat-Shape Runners Holder (.. - RM8.00
- [ZA] 1/72 Scale SF95-001 Murasame L.. - RM130.00
- [NO BOX] Bandai HGBD:R 1/144 HG Dou.. - RM14.00
- [02] [Kyokai Senki / Boundary Fight.. - RM50.00
- HG Amplified IMGN RYUJINMARU - RM169.00
- SD Gundam Sangoku Soketsuden - Bug - RM3.80
-
-
- PRE ORDER
- CHECK ORDER